5 Furniture Assembly Techniques: A Step-by-Step Guide
Introduction
Assembling furniture can be a daunting task, but with the right techniques and a bit of patience, anyone can turn a box of parts into a beautiful and sturdy piece of furniture. Follow these basic assembly tips to ensure your next furniture assembly is a success.
1- Before Attaching Screws
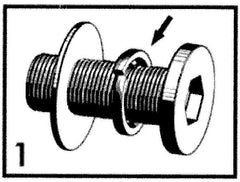
Always start by organizing your screws, washers, and other hardware. Before attaching each screw, remember to place the smaller lock washer (spacer) between the larger washer and the head of the screw. This small step is crucial for maintaining the integrity of the screw's grip and preventing any future loosening.
2- Positioning Parts and Screws
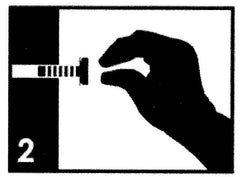
Lay out all parts of the furniture according to the assembly instructions. Position each part in its correct place and insert all screws into their respective holes. At this stage, hand-tighten the screws only until they are about 70% tight. This allows for slight adjustments as you progress with the assembly.
3- Ensuring a Level Foundation
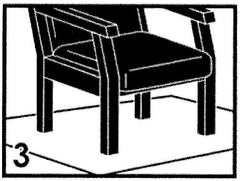
Before proceeding further, ensure that the furniture piece rests on a flat and level surface. This is critical for the overall stability and functionality of the furniture. If you need to turn the piece on its side, protect it and your floor by placing a soft blanket or carpet underneath. This precaution prevents scratches and damage to both the furniture and the flooring.
4- Adjusting Furniture Height
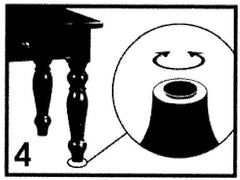
Many pieces of furniture come equipped with optional height adjustment knobs underneath each leg. These knobs allow for minor adjustments to ensure the furniture sits level, even on uneven floors. To raise the leg level, turn the knob counterclockwise; to lower it, turn clockwise. This feature is especially useful for eliminating wobbles and ensuring that all legs are evenly touching the ground.
5- Tightening Screws
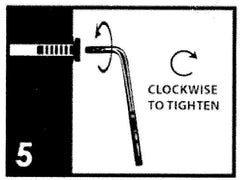
Once all parts are correctly positioned and the furniture is level, it's time to fully secure everything. Using the tools provided with your furniture, tighten all screws completely. This final tightening ensures that every component is securely fastened and that the furniture has the structural integrity needed to withstand daily use. Store the tools for later maintenance. Tighten the screws again after two (2) weeks, and then at least once every six (6) months after that.
Final Checks
With the screws tightened and the furniture assembled, do a final check to ensure that all parts are properly aligned and that there are no loose components. Your furniture is now ready for use. Enjoy the satisfaction of having assembled a sturdy, functional, and attractive piece of furniture by yourself.
Conclusion
Furniture assembly doesn't have to be a frustrating experience. By following these basic assembly techniques, you'll not only save time but also ensure that your furniture is assembled correctly and safely. Remember, the key to successful furniture assembly lies in patience, precision, and attention to detail. Happy assembling!


Leave a comment